Pages

Showing posts with label peghead. Show all posts

Wednesday, October 30, 2019

Repairing a 1970's Ovation

I don't really like doing repairs, too much stress working on someone else's instrument. However when I got asked about this one I thought it would be a good challenge. That and well I really could not make it any worse....

The serial number says this is about a 1973 Ovation Classical and as you can see it had a hard knock and some VERY bad repair attempts (multiple).. The deal was the owner simply wanted a playable instrument, cosmetics were less important as the guitar overall is pretty beat up..


Step one was get rid of the wood screws!!!!!!!! Then clean up as much of the old glue as possible and try and get the parts to fit back together. This was the hardest part of this and I was worried I would not get the pieces back in any form that would be stable enough for the next steps.. Eventually got there and the two pieces were joined with medium CA glue..


Next route out as much of the damage back into good wood as possible and add in new Mahogany splines..


Then these shims could be carved to match the neck. White is an epoxy putty used to fill some gaps where things were solid  and I did not want to route out larger pieces of the neck, it goes on dark but unfortunately dries almost white.. errr..


Then trying to add some colour to match the original and add some finish. Ovations finish is THICK so it was a bit challenging to get a good "seam" between the repair and the original but by using some UV Cure finish I got an OK result.


 Because of the condition of the guitar and time/cost considerations I did not do things like try and maintain the full neck center stripe. I prioritized playability over cosmetics..

Here is the finished result with a new truss rod cover (old one was broken/missing) and all strung up back in one piece again..


I should also give credit to where I got the idea for this repair method..

It came from a Canadian Luthier Ted Woodford He's got a pretty good youtube channel and I really like his repair thought process..

https://sites.google.com/a/woodfordinstruments.com/woodfordinstruments/

https://www.youtube.com/user/twoodfrd/featured


Thursday, October 15, 2015

X-Carve CNC Inlay

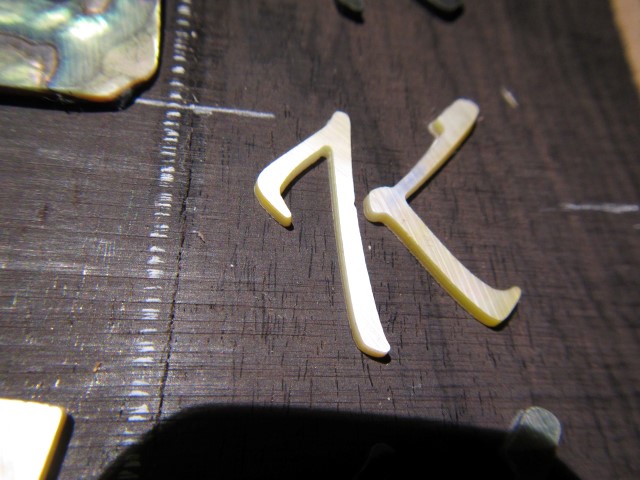
OK I've done some tests with the X-Carve for inlay with actual shell and actual parts I'll use on future guitars...

Pretty darn happy, the first one took bit of playing to get the offsets right but after that all pretty quick & easy.


Wednesday, April 2, 2014

Some Peghead Work

Now that the inlay is in Rick's tenor I can continue to work on the peghead  for it and the parlour..

First the overlay gets glued to the peghead. Then the peghead shape gets cut out.. There are a number of ways to do this and in fact for these two guitars I used two different ways. For the Parlour I traced the shape of the template on to the peghead and cut close to the line with a band saw. Then I attached a template to the top of the peghead and used a template sanding drum in a drill press to sand away the excess. Works just fine.

On Rick's I used a template "router" in a drill press.. Which is in fact just a piece of tool steel with the end sharpened (filed) at about 35 degrees and run in a drill press as fast as the drill press will run. With this method the template is attached to the back of the peghead.

For the peghead shape I used on this tenor  this method is really not required, the sander method will work just fine but for more elaborate pegheads like those found on classical guitars this is a great way to do things and it is very safe. The only drawback is you need to make multiple passes around the peghead as you can only take small bites with this method..

Some people use a regular router for this as well but for me too many things can go wrong, especially routing across the end grain of the peghead.


Drill press "router" setup

and the result


After this was done I cut the slots in the Parlour's peghead for the tuners, its a slot head design, my first one. To do this I used the LMI slotting jig and it worked out perfectly.

LMI jig set up to drill tuner holes

Flipped over to route the slot

Completed, back view

And front with a tuner test fitted
The fretboard end of the slots still need a ramp filed in them, but I'll do that another day.


Tuesday, March 18, 2014

Starting on the Necks

OK as you might remember some time ago I laminated up the 5 piece necks for both guitars so now it is time to start making the straight stick into a neck..

First step is to cut & glue the scarf joint for the peghead. The cut is first made on the band saw then cleaned up with a hand plane before gluing back on to the remainder of the neck. Angle of the joint is 14 degrees.

Many people do this cut with some sort of jig on a table saw but in the interest of space and not having to store yet another jig this is a quick and simple method.

Also many people have elaborate gluing jigs to prevent the joint from slipping when clamping pressure is applied. I find some binding tale and a bit of care is all that is really needed.

Rough joint from the band saw

Cleaned up with a hand plane

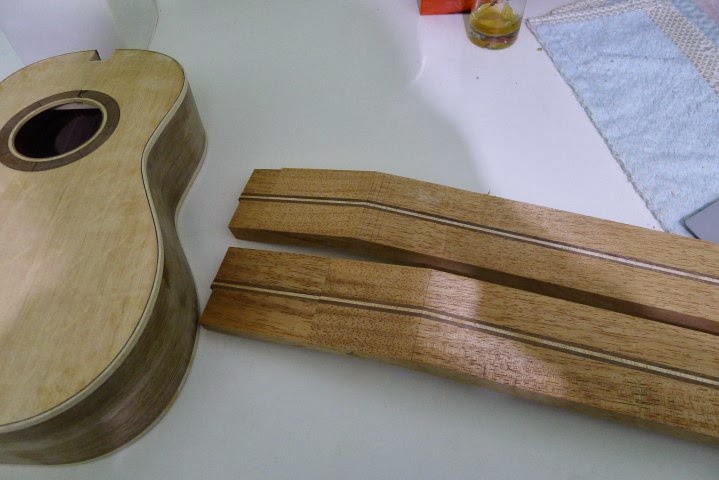
Both Tenor and Parlour necks with the scarf joints clamped

The result, you can slide the cut piece back when gluing to
reduce the amount of thickness work with the plane
 you need to do after the fact

Different angle

Joints hand planed smooth and getting close to final peghead
thickness. The veneers need to be accounted for and then
the pegheads planed to final thickness. This also establishes
the final nut position

And the other angle again

Wednesday, March 6, 2013

Working on the Neck & Routing the Peghead

The neck now has the stack heal done and the peghead veneer glued on. Next step is to route out the peghead shape. I Don't use a router for this step but instead use the method Robbie O'Brien shows in his classical guitar course. It uses a piece of tool steel sharpened at a 45 degree angle and run in a drill press at high speed.

The advantage is it is safe and there is little chance of tear out. I like the idea of not getting my fingers close to high speed cutters..

It is a bit slow as you have to take very shallow passes but it works well.

After that the nut end of the peghead is trimmed as well and that's about all to be done until it's time to carve the neck.
Stacked heel & veneer added

Template attached


Drill press router

Simple jig for squaring off the nut end of the veneer

Completed