Pages

Showing posts with label bridge. Show all posts

Saturday, February 25, 2017

Bridges

The bridges for both the cross over and the uke are made, mostly CNC with a bit of hand work, Came out not too bad, Not attached in the photos, just sitting there.

Now on to pore filling Wenge..


CNC setup

Thursday, March 24, 2016

CNC Pyramid Bridge

I'm not a huge fan of CNC for guitar building but I do like it for some steps. In this case making a Pyramid bridge.

For those interested Modeled in Sketchup and milled using Vectric vCarve.


Thursday, July 3, 2014

Getting There....

So the Bridge is glued on and the tuners installed. Looks good I think now just the Nut, saddle & setup to do and I can see how it sounds...


Wednesday, May 21, 2014

French Polish, Bridge and the Rest of the Jobs

So the French Polish is done, finally after re-doing the top. The frets are leveled and polished. Tonight I attached the bridge and rough shaped the nut & saddle..

Now all that is left is:
drill & taper the bridge pin holes
slot the holes
finish the nut
finish the saddle
attach the tuners
string it up
set the intonation on the saddle
see how it sounds

ready for the bridge

It should fit

Positioning the bridge

Temporarily locator screws

clamped for the night


Thursday, March 13, 2014

Tenor & Parlour Work

I'm trying to get the Parlour guitar caught up to the Tenor... Almost there..

The Bindings are on the tenor and they turned out very nice..

Top View

Only the top has the back purfling line to separate the binding & top
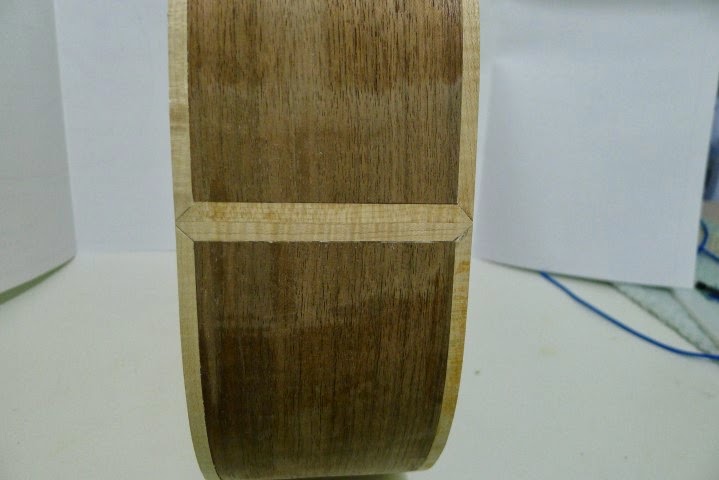
And from the side, simple & nice

Simple end wedge

Now for the parlour the end blocks are on, the kerfing is done the top & back are braced and the back has the braces carved and is ready to go on the top.. Just need to carve the top braces and get it voiced and  then I can radius the sides and get the box closed hopefully in the next day or two..

Then on with the necks..

Rough back bracing

Bridge patch last of the top bracing

More clamps

Braces shaped & back label on 


Wednesday, January 22, 2014

Getting Very Close

So the finish is done a satin sort of French Polish, not too shiny, I like it.. The tuners are on a nut & Saddle are made and tonight I glued on the bridge... Should be making music with this Mandocello pretty soon..

I think at least for the start I'm going to string it up with the C string pair as an Octave pair its easy to change if I don't like it.. But harder to go the other direction...

French Polish so far my favourite finish

Front view

Back view

Tuners front

Tuners back

The only way I could set the intonation was to actually string it up
with a temporary tailpiece and just fiddle with the bridge position...
actually 2mm of compensation came out pretty close

Gluing on the bridge


Wednesday, March 13, 2013

Making a floating Bridge with My New Toy

The Celtic Tenor guitar I'm working on will have a floating bridge and tailpiece so tonight I thought I would make the floating bridge.. I just happen to have to have recently got a Bishop-Cochran preciscion base for my Dremel tool and this was a good opportunity ti try it out.. http://www.bishopcochran.com/

I used this to cut a 3/32" wide and 5/32" deep slot for the bone saddle that will be inseted into the bridge, which is ebony.

The precision base worked great and I thing the bridge turned out good. It is patterned after the period Regal bridge that would have been on this style of guitar in the 1920's.

The base (nice red colour) and a simple set up in a vise to cut the slot

The completed bridge

Thursday, January 24, 2013

Gluing on the Bridge & Slotting the Nut

Another step closer to strings going on..

Bridge is measured aligned and glued on! The nut is shaped and slotted (it's a black horn nut in case anyone is wondering)


Yes I did remove that stray bit of glue on the left :-)

Thursday, January 3, 2013

Finished the Bridge

Well since I built these bridge jigs there is only one way to test them out and that is to finish the bridge for this guitar. I think It turned out good.

Before -- rough ebony blank

After - Bound, slotted and drilled

The other side -- Saddle is black horn,
the pins will be Bloodwood to match the binding.

Wednesday, January 2, 2013

Jigs and More Jigs

A big and sometimes frustrating part of luthery is building jigs. Here are three, a very simple one for marking the position of the bridge pin holes. one for routing the saddle slot into the bridge  and one for routing the binding channels..

The keen eyed among you will know that I already made a jig for this based on the KMG guitars design. Well this one is similar but I hope an improvement that will work a bit better for me..

Very Simple Jig
Bridge is just clamped in and the position of the holes can be marked with and awl  
Bridge is held in place while saddle slot is routed 


guitar side references on the guide

This is similar to some production jigs I've seen and a static version of Charles Fox's I believe

A big part of luthery is getting the process set up how YOU like it. There are many ways do do each step none of them wrong you just need to find the one that works best for you and finding the right method to route binding channels and do it in a shop with very limited space has been a challenge.