Pages

Showing posts with label route. Show all posts

Wednesday, February 1, 2017

Neck & Headstock Work

So I'm actually making progress on the crossover guitar..

The neck to body attachment is mostly done and the tuner slots are routed into the headstock.

This will be a completely removable neck so it has what can best be described in wood working terms as a floating tenon which is glued into a mortise in the neck and floats in a mortise in the body similar to a regular bolt on mortise & tenon neck. The reason for the floating tenon glued into the neck is to that propell nuts can be used and there is no possibility they will tear-out of neck end grain.

There will also eventually be a fingerboad support routed into the body.

Tenon with Propell Nuts

Neck Mortise

Glued in Place

Ready to Route the Slots

Done

Came out good!

Test fitting tuners

Sunday, March 16, 2014

Busy Weekend

OK done, the Parlour is now caught up to the Tenor, so I can put away all the body jigs & moulds and get on with making necks..

This weekend I  carve to top braces and finished voicing the top, glued on the back & top, cut the binding channels and the channel for the top Abalone purfling and got all the bindings & purfling installed.. I was a bit concerned how the Wenge would route as it seem brittle but it was fine..

Still lots of finish sanding to do on both bodies but that can wait until later...

All in all a productive weekend and I'm officially in love with my new binding router jig.. works so darn well..

I'm also really happy with how the binding came out on the Parlour the Abalone looks great and not too gaudy..

Very happy with this look

No Abalone on the back

End wedge

Top view

Both now waiting for necks


Tuesday, March 11, 2014

Binding Channels

Undoubtedly one of the more stressful parts of building a guitar taking a 10,000 RPM router to a guitar body, quite a bit can go wrong.. If you've followed this blog you've seen a couple of ways I've cut binding channels in the past.. All worked with varying degrees of stress and some variance in accuracy.. Most of the jigs I used were chosen to accommodate having a very small space for a shop. I just don't have room for a large parallel arm fleishman/williams-style jig.. I've been looking at the LMI or the Stewmac jig for some time and when LMI updated their design I did some thinking and decided that looked the best..

It is still a compact jig that I can store away in a cupboard when not in use and it works like a charm..

Setup is easy, adjustment straight forward and it works, despite screwing up the install of the top bindings and having to cut them off (with the jig) and even that when well..

Just pay attention to the getting the guitar level in the carrier.

I am far less stressed about cutting binding channels now that I have this jig.

The only change I had to make was a slightly different assembly of the carrier since I am doing a small bodied guitar..

Carrier assembled in a "non-standard" way

The results

Mounted to my work table

Thursday, February 27, 2014

End Blocks, Linings and the Back

Just what the title says, made the end block and cut the mortise that will eventually hold the neck & drill the holes for the bolts..

All the kerfed kinings are glued on the sides and they are ready to be radiused.

The back has the bracing glued on and ready to be carved.. All in all good progress.

Neck block in the jig ready to be routed

and complete with holes drilled

both blocks attached to the sides


Gluing on the kerfed linings, can never have too many clamps

all glued on

notched for the braces

All glued up


Friday, February 21, 2014

Finishing the Rosette and Jointing the Back

The rosette is now finished and the top is planed and sanded to thickness, in this case looks like 2.6mm is it.. or at least as far as I have the guts to go..

Rosette installed in the guitar top

The inner & outer purfling lines added.

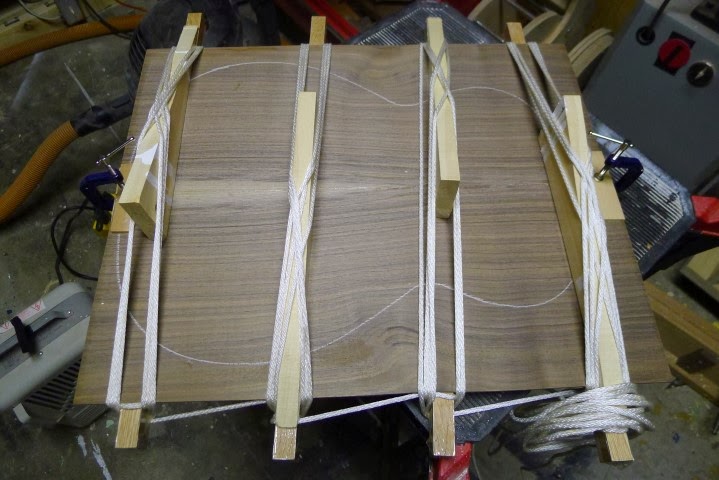
I've also got the back jointed tonight, and maybe I can get it down to thickness tomorrow..

Using a shooting board to get the joint smooth

I can never quite get it as smooth as I want with the hand plane
but a couple of passes with some 220 grit paper
on a framing square does the trick.

All clamped up the simple old fashioned way

So once the back is to thickness things can start coming together to look like a guitar....


Monday, February 17, 2014

Another Rosette

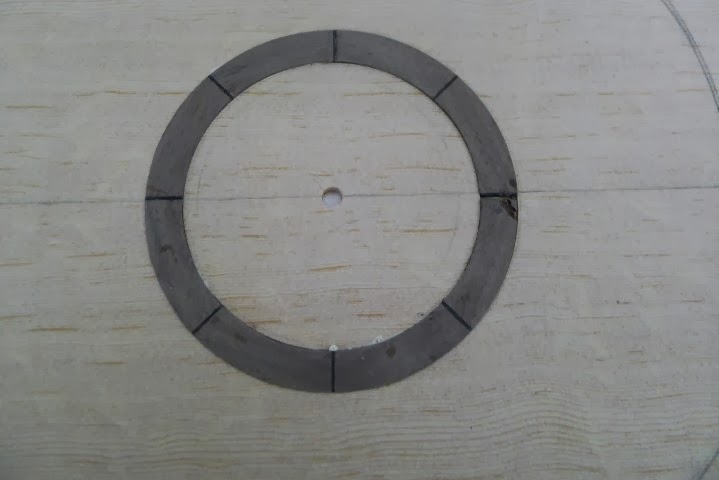
OK for Rick's tenor I thought I would get away from the random rosette and go with an 8 piece with black purfling between the pieces and around the rosette..

Since the back and sides are Black Walnut and I have a couple of chunks of that laying around, that's what got used..

First cut some thin strips on the table saw. then cut those strips into pieces with a 22.5 deg angle on each side..


Then glue the pieces together with a 1mm strip of black purfling between each..

Glued up (fish glue)

all cleaned up
Then secure the whole thing a route out the rosette shape


Turned out pretty good, one piece came apart during the routing, but re-glued and that gets to be the part under the fingerboard extension :-)

Next Step is to route the channel into the top..