Pages

Showing posts with label joint. Show all posts

Saturday, September 12, 2015

Joining the Tops & Backs

A quick plane on the shooting board and the top and back halves are ready to be glued together. Lots of ways to do this, I use a pretty simple jig of 4 sticks and 4 wedges and some rope.. Works for me.


Once joined they get rough thicknessed and you have tops and back to two Parlour Guitars.

The Pacific

Cedar & Rosewood - I ended up changing this top as it was just too thin.
It will have to be a Uke some day


Friday, February 21, 2014

Finishing the Rosette and Jointing the Back

The rosette is now finished and the top is planed and sanded to thickness, in this case looks like 2.6mm is it.. or at least as far as I have the guts to go..

Rosette installed in the guitar top

The inner & outer purfling lines added.

I've also got the back jointed tonight, and maybe I can get it down to thickness tomorrow..

Using a shooting board to get the joint smooth

I can never quite get it as smooth as I want with the hand plane
but a couple of passes with some 220 grit paper
on a framing square does the trick.

All clamped up the simple old fashioned way

So once the back is to thickness things can start coming together to look like a guitar....


Sunday, February 9, 2014

Parlor Guitar

So I've started the Parlor Guitar, the back & top are jointed and thicknessed and so are the sides. As well the rosette is installed complete with Zipflex Paua Shell purfling.. The Zipflex installation went well.

This is my first time building with Wenge and I've heard good things about it and it does seem to tap real nice but it's pretty brittle and tools need to be real sharp to plane, I'm also thinking pore filling is going to be a real chore as it has huge pores.....

Oh well it is suppose to sound great!

Planing the Cedar top to thickness

Gluing up the Wenge back

Running the Wenge rosette through my home made thickness sander,
The rosette is random pieces of Wenge with BWB purfling between them

Completed rosette and routed channel for it

Rosette installed and inlayed with the Paua shell
Closer view

See what I mean about pores.....


Monday, March 11, 2013

Attaching the Neck

So Now it really looks like a guitar, all be it a tiny one..

The neck is attached with a dovetail joint, my first try at that type of attachment. It took quite a bit of trial and error as I slowly crept up on the correct fit of the joint. The end result was good, sorry no photos of the process, too busy thinking about where to file off small adjustments..

I prefer doing a bolt on mortise and tenon joint but when the guitar is too small for you to fit your hand in the sound hole that is not an option.....


Monday, February 11, 2013

Jointing the Top

So here is my procedure for jointing the top, the back is done the same..

Clean up the edges on a shooting board using a jack plane, in this case a nice low angle jack from Lee Valley. - great plane.


I can get the joint perfect using the hand plane but I often times take more time than I would like chasing the joint around. So I finish the edge with a few passes of a 24" level with 220 PSA Sand paper. I find it works better for me this way.


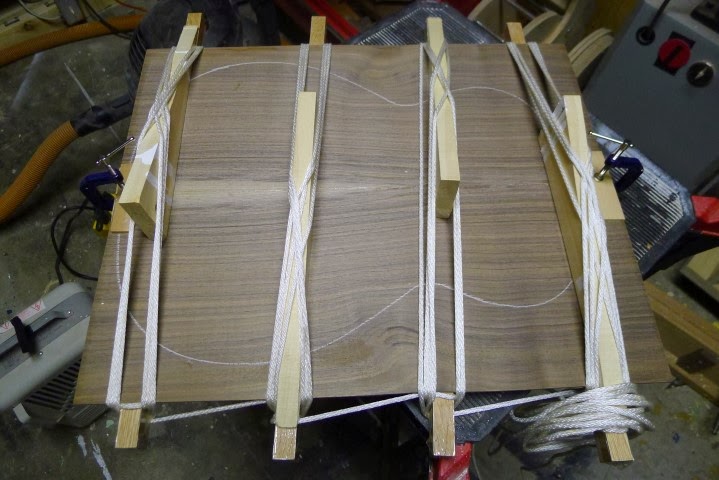
Then the joint is glued together using original Titebond and held fast using a simple wedge jig, again simple and works great.


Thursday, February 7, 2013

Thicknessing and Jointing

Tonight I thicknessed the sides and jointed the back. Rough thickness is obtained using a Safety Planer and the final thickness is obtained using a home made drum sander.. Sides are about 2mm and the back right now is about 3mm which is a bit think bit I might try leaving it there, not sure. My idea is that the thicker = stiffer back might give a bit more projection from the small instrument.. Not sure if I will leave it at that thickness or not...

The Safety Planer, used by many Luthiers

I very simple jig to hold the far side of the wood down as it goes through
Back Jointed using a simple Jig

I'm also getting ready to route the dovetail mortise in the heel block, I'm doing this early on in the process as opposed when the box is closed, I'm thinking I prefer this but this will be the test.

Anyway here is the jig I made set up to route the dovetail using a template from LMI.