Pages

Showing posts with label bracing. Show all posts

Wednesday, November 7, 2018

Belated Updates

I've been a bit slack updating the blog of late. Summer was busy with non-luthier stuff and life just gets in the way sometimes. I have however not been completely ignoring luthier work however. I've actually got a fair bit done over the last few months considering all the others things going on in life..

First off someone in the small orchestra Julie plays in had a cello in need of repair/restoration. Turned out to be an Englehardt Cello, a pretty cheap student model but apparently pretty common in school music programs. The cello was the victim of and attempt at refinishing that was at best misguided.. It was also missing most of the parts like a bridge, tuning pegs, tailpiece and sound post. Anyway this got those parts replaces and a new finish put on it.. It is going back to a local music program, It was interesting to do as I am really not a repair person.

The only "before" I did, after I removed the rest of the finish

Ready to be played again


Also the next builds are well underway, those are an Irish Bouzouki and a Octave Mandolin, both built as flat top guitar bodied instruments. The Bouzouki will be Rosewood and Spruce and the OM Honduran Mahogany and Cedar. I started by making the bindings for these, I've been meaning to try my hand and making my own bindings with purfling for some  time so it was good to try that and it worked out great.

The Setup for cutting thin binding strips with a slitting blade on a small table saw

The end result

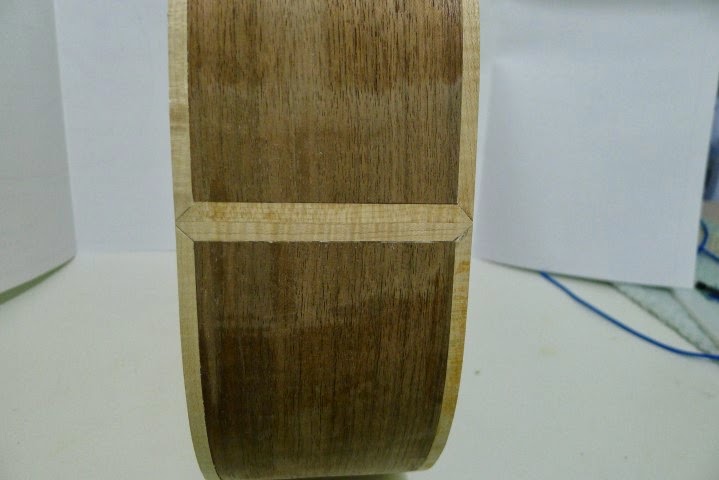
I've also got the sides bent and glued up to the end blocks for both instruments and the tops and backs well on the way to being done.. Just starting to brace up the tops today..


Here I'm doing the rosettes..


And here are one of the backs and top bracing underway.


Thursday, March 13, 2014

Tenor & Parlour Work

I'm trying to get the Parlour guitar caught up to the Tenor... Almost there..

The Bindings are on the tenor and they turned out very nice..

Top View

Only the top has the back purfling line to separate the binding & top
And from the side, simple & nice

Simple end wedge

Now for the parlour the end blocks are on, the kerfing is done the top & back are braced and the back has the braces carved and is ready to go on the top.. Just need to carve the top braces and get it voiced and  then I can radius the sides and get the box closed hopefully in the next day or two..

Then on with the necks..

Rough back bracing

Bridge patch last of the top bracing

More clamps

Braces shaped & back label on 


Thursday, March 6, 2014

Voicing the Top

So voicing the top to me means carving the braces down until I get some sort of tap tone on the top that is musical and has a ring and sustain to it.. Pretty subjective really, there are other means that are more mechanical and use various scientific equipment but I really don't have the interest in learning those or buying yet more equipment.. The method I use has been used for a very long time and can be very successful.


Top with rough bracing

Carved and scanded braces

Back braces also sanded

Top and rest of body ready to be closed up.


Sunday, March 2, 2014

The Weekend's Progress

So things are moving along, the back braces are carved on the tenor and the back is not glued on the sides. All the top braces are glued on and ready to finish voicing the top.

The bindings are bent and since I had the side bender set up the parlour guitar's sides and bindings are bent as well...

Using a go-bar deck to clamp some of the
top bracing

Back now on the sides

Top and back together


The parlour's sides resting in the form

Thursday, February 27, 2014

End Blocks, Linings and the Back

Just what the title says, made the end block and cut the mortise that will eventually hold the neck & drill the holes for the bolts..

All the kerfed kinings are glued on the sides and they are ready to be radiused.

The back has the bracing glued on and ready to be carved.. All in all good progress.

Neck block in the jig ready to be routed

and complete with holes drilled

both blocks attached to the sides


Gluing on the kerfed linings, can never have too many clamps

all glued on

notched for the braces

All glued up


Tuesday, October 22, 2013

Bracing the Top

So time to cut the top braces to rough shape and glue them to the top. For the top I chose a 20' radius which is perhaps a bit tighter than normal but I believe (hope) it will work well with this instrument.

Gluing the X brace

Then the tone bars and finger braces

Next the upper transverse brace and plate (glues without a radius)

Lastly the soundhole supports (also without a radius)

Sunday, October 13, 2013

Bracing the Back

So the braces for the back are cut and sanded to a 15 foot radius then rough shaped on the band saw.

Then glued on in a go-bar deck..

Ready for final shaping and a quick voicing of the back.


Wednesday, August 28, 2013

Bracing Design & Other Changes

So I have a fingerboard layout and next on the list is sorting out the bracing design. The original Gibson L-O was "H" braced and that will not do for a MandoCello. So I'll design a more or less standard "X" brace for this.The trickiest part of this is positioning the X and getting the bridge path in the right spot.

I decided to go with and X slightly shifted away from the sound hole, which will give a slightly stiffer lower bout. i was also thinking about using 3 tone bars but this looked like over kill so I went with the more standard 2.

One of the big changes that came out of this exercise was what I had originally envisioned to be a 12 fret to the body instrument ended up a 14 fret to the body instrument. In the 12 fret configuration the bridge just did not end up in the right spot, this was due to using a longer scale than the original instrument and the fanned-fret configuration.. So a 14 fret instrument it is.. Now I guess I really do have to carbon fibre reinforce the neck as well as the truss rod.


Friday, February 15, 2013

Back Braces

The back braces are now glued to the back, they are first pre-radiused in a radius dish. For this guitar I used a 15' radius.. The Braces are then glued in using a go-bard deck and radius dish to clamp them to the back.. This forces the back to a 15' radius.


Friday, October 19, 2012

Bracing the Top

Back to Guitar building.
I've finished the top bracing. it is a bit on the heavy side but then the top is Western Red Cedar which is a "looser" or "floppier" wood than Spruce so it needs to be thicker and/or have stiffer bracing.. The top taps well and sounds musical so the bracing should be good..

Rough shaped braces attached and ready for shaping/voicing

The Finished Product