Well, I don't keep track of the number of hours spent on a guitar but this one was started in September..
It is all strung up and making music, it has good sound and lots of sustain so I'm happy with the result..
Sunday, February 3, 2013
Thursday, January 24, 2013
Gluing on the Bridge & Slotting the Nut
Another step closer to strings going on..
Bridge is measured aligned and glued on! The nut is shaped and slotted (it's a black horn nut in case anyone is wondering)
Bridge is measured aligned and glued on! The nut is shaped and slotted (it's a black horn nut in case anyone is wondering)
.JPG) |
| Yes I did remove that stray bit of glue on the left :-) |
Sunday, January 20, 2013
Saturday, January 19, 2013
Finished French Polish
So the finishing is finished ... A good amber shellac, lots of thin coats and lots of rubbing.. It has the overall darker tone I was looking for now to install the tuners as fit the bridge.
Tuesday, January 15, 2013
French Polish
So far my preferred finish is French Polish, partly because it is relatively easy & very safe to do unlike nitro lacquer.. Besides that it has little effect on the instrument tone is easily repaired and looks great.
I use a technique taught by Robert O'Brien, which uses a very thin or light cut of shellac (less than 1lb) and many many very light coats. It works well and is quick (as far as French Polish goes)
I use a technique taught by Robert O'Brien, which uses a very thin or light cut of shellac (less than 1lb) and many many very light coats. It works well and is quick (as far as French Polish goes)
.JPG) |
| Before, pore-filled and sanded |
.JPG) |
| Applying the seal coats |
.JPG) |
| Polishing |
 |
| Back finished |
Thursday, January 3, 2013
Finished the Bridge
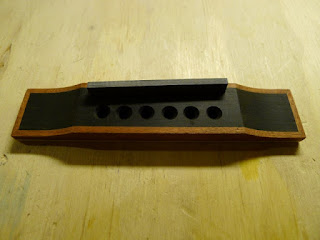
Well since I built these bridge jigs there is only one way to test them out and that is to finish the bridge for this guitar. I think It turned out good.
.JPG) |
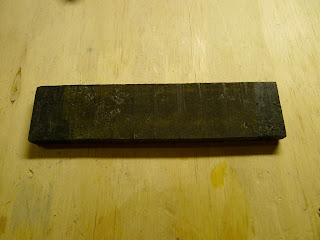
| Before -- rough ebony blank |
.JPG) |
| After - Bound, slotted and drilled |
.JPG) |
| The other side -- Saddle is black horn, the pins will be Bloodwood to match the binding. |
Wednesday, January 2, 2013
Jigs and More Jigs
A big and sometimes frustrating part of luthery is building jigs. Here are three, a very simple one for marking the position of the bridge pin holes. one for routing the saddle slot into the bridge and one for routing the binding channels..
The keen eyed among you will know that I already made a jig for this based on the KMG guitars design. Well this one is similar but I hope an improvement that will work a bit better for me..
A big part of luthery is getting the process set up how YOU like it. There are many ways do do each step none of them wrong you just need to find the one that works best for you and finding the right method to route binding channels and do it in a shop with very limited space has been a challenge.
The keen eyed among you will know that I already made a jig for this based on the KMG guitars design. Well this one is similar but I hope an improvement that will work a bit better for me..
.JPG) |
| Very Simple Jig |
.JPG) |
| Bridge is just clamped in and the position of the holes can be marked with and awl |
.JPG) |
| Bridge is held in place while saddle slot is routed |
.JPG) |
| guitar side references on the guide |
.JPG) |
| This is similar to some production jigs I've seen and a static version of Charles Fox's I believe |
A big part of luthery is getting the process set up how YOU like it. There are many ways do do each step none of them wrong you just need to find the one that works best for you and finding the right method to route binding channels and do it in a shop with very limited space has been a challenge.
Subscribe to:
Posts (Atom)
.JPG)
.JPG)
.JPG)
.JPG)
.JPG)


.JPG)

.JPG)
.JPG)
.JPG)
.JPG)
.JPG)
.JPG)
.JPG)
.JPG)
.JPG)
.JPG)
.JPG)